
1. Starting a Relationship
Relationships are where everything in Proofdesk happens. Each one represents the link between your organisation and a customer and acts as the central point for all reviews, customer risk assessments, and approvals.
Whenever you begin working with a new customer (or record an existing one in Proofdesk for the first time) you’ll start by establishing a new Relationship.
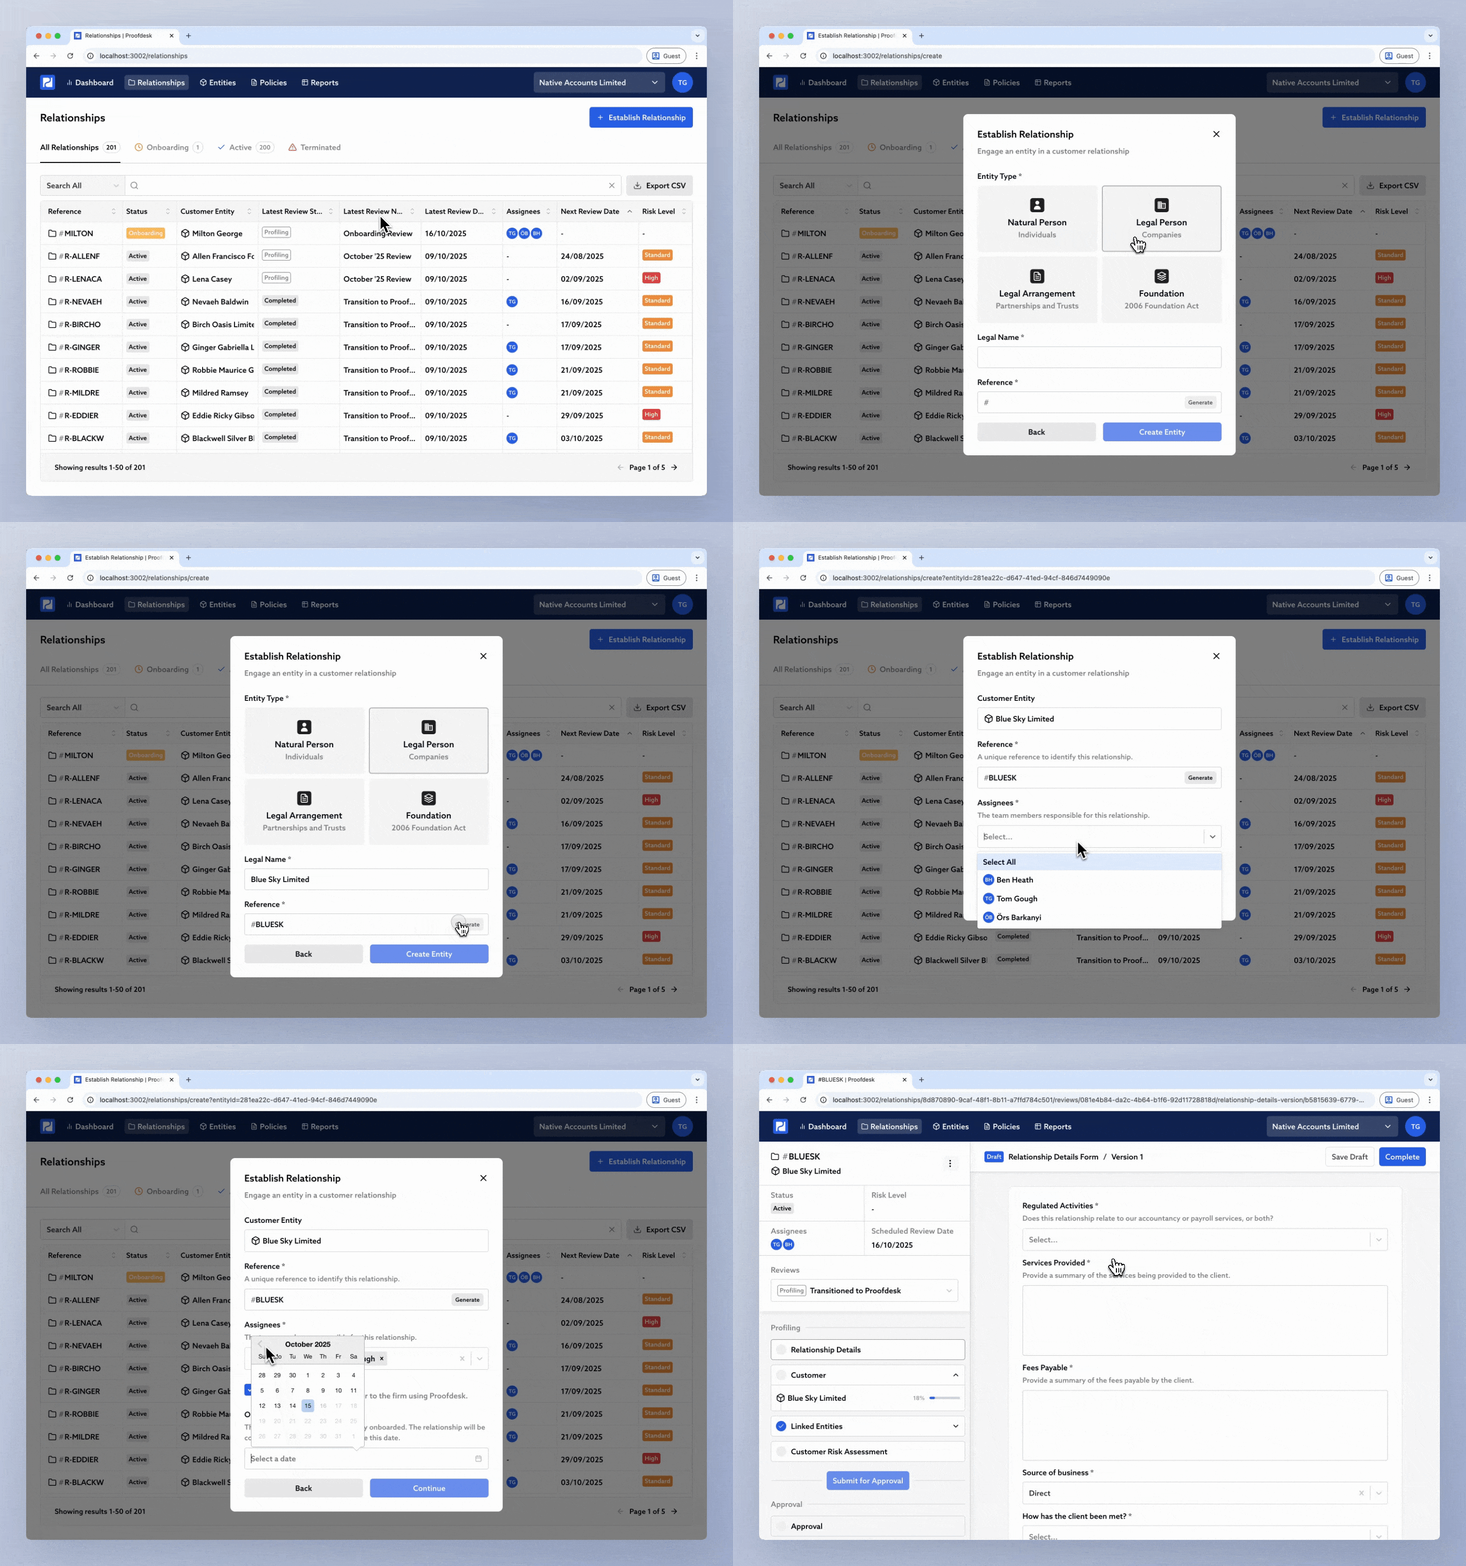
Go to the Relationships List
Select Relationships from the navigation bar at the top of the page. This shows every Relationship your organisation has recorded in Proofdesk.
Click Create Relationship at the top of the list to start a new one.
Select or Create the Customer
The Create Relationship window opens. Select the Customer engaged in this relationship and click Continue . In most cases the customer is the entity you are providing services to, has signed your terms of business and that you raise invoices for.
Most relationships have a single customer. If your organisation uses Joint Customers , you can select more than one customer on this step - for example, an accountancy firm completing a joint tax return for a married couple. See the Joint Customers specialist guide.
-
If the entity already exists in Proofdesk, search for and select it from the list.
-
If not, click + New Entity .
When creating a new entity, you’ll be taken to the New Entity form where you’ll:
-
Choose the entity type - Natural Person (individuals), Legal Person (companies), Legal Arrangement (trusts and partnerships), or Foundation (Foundation Act 2011).
-
Enter the legal name of the entity.
-
Enter a reference or click Generate to have Proofdesk create one automatically. References are helpful for marrying up your records in Proofdesk with your other records.
Once saved, you’ll be returned to Create Relationship , with your new entity already selected. You'll be able to access the entity you created independently of this relationship from the Entities tab whenever you like.
Complete the Relationship's basic details
On the Create Relationship form:
-
Enter a reference for the Relationship, or click Generate to let Proofdesk create one. This reference is up to you, but it's useful to enter a reference you use elsewhere, like a client reference number you use for billing, a policy number, or a matter code.
-
Under Assignees , select the members of your team responsible for managing this Relationship. These team members will receive email notifications when the status of this relationship changes.
-
If these customers were onboarded prior to you adopting Proofdesk, tick Existing Relationship and complete the historic onboarding fields: Original Approval Date (required), and optionally Risk Level and Latest Review Date . This is how Proofdesk distinguishes between new and existing customers for your Statistical Return and calculates the next scheduled review for historic relationships.
What Happens Next
After you click Create Relationship , you will be taken to the newly created relationship 's page. From this point on, everything you do for this customer including updates, periodic reviews, trigger events, and approvals, will all take place within this Relationship page.
Here you will be able to complete the various forms to do with the relationship, including the Relationship Details, Due Diligence and Customer Risk Assessment forms. When these forms are complete, you can start a review .
Following this the relationship's forms can be updated, and periodic reviews can be started whenever the need arises.